Classic Chicken Cordon Bleu
Crispy Chicken Cordon Bleu — Swiss Cheese and Ham Wrapped in Golden Perfection
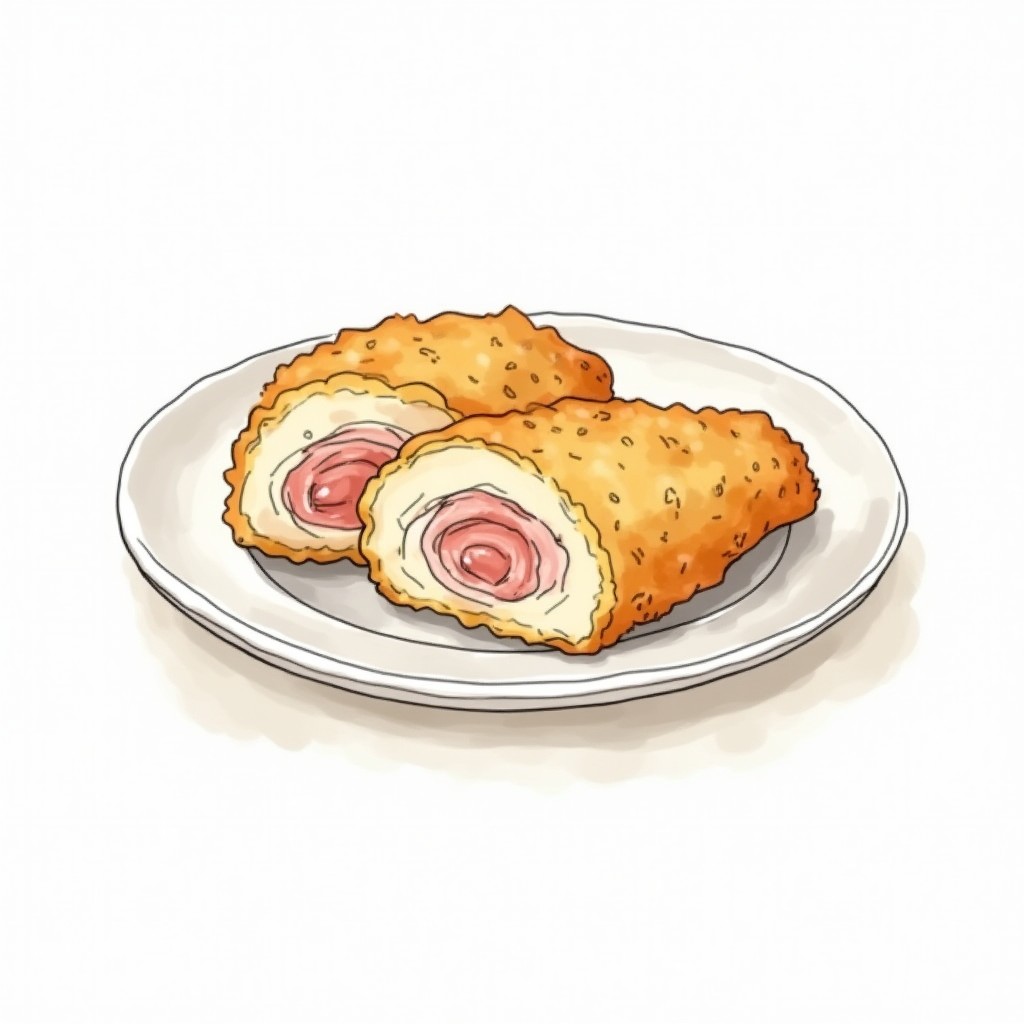
This elegant dish takes the intimidation out of stuffed chicken. The key is pounding the breasts thin enough to roll easily, then building a crispy panko shell that locks in all the melted cheese and savory ham while the chicken stays incredibly moist.
Chicken cordon bleu has earned a reputation as restaurant-fancy food, but that mystique mostly comes from seeing it done poorly — dry chicken wrapped around processed cheese, coated in soggy breadcrumbs. The real thing, done right, is surprisingly straightforward once you understand the fundamentals.
The dish originated in Switzerland, despite its French name, and the technique is all about balance. You need chicken thin enough to roll without cracking, quality ham that won't overpower, Swiss cheese that melts smoothly, and a coating system that creates a proper seal. When these elements work together, you get something genuinely elegant: tender chicken that stays moist while the cheese melts into the ham, all protected by a golden, crispy shell.
The secret isn't in fancy techniques — it's in the details. Pounding the chicken to an even thickness, seasoning before stuffing, and building your breading station correctly all matter more than any special ingredient. Get these basics right, and you'll have a dish that looks impressive but feels completely achievable.
Nutrition
Ingredients
- 4 pieceboneless skinless chicken breasts, pounded to 1/4-inch thickness
- 4 slicedeli ham slices
- 4 sliceSwiss cheese slices
- 1 tspsalt
- ½ tspblack pepper
- 3 tbspbutter, melted
Breading
- 1 cupall-purpose flour
- 2 largelarge eggs, beaten
- 1½ cuppanko breadcrumbs
Instructions
- Get your oven heating to 375°F and line a baking sheet with parchment paper. This prevents sticking and makes cleanup a breeze.
- Sprinkle the pounded chicken breasts evenly with salt and pepper on both sides. The seasoning needs to penetrate the meat before you start rolling.
- Lay one slice of ham and one slice of cheese on each chicken breast, keeping them centered. Roll each breast tightly from one end to the other, then secure with toothpicks to prevent unrolling during cooking.
- Arrange your breading station: flour in one shallow dish, beaten eggs in another, and panko in a third. This assembly-line setup keeps the process clean and efficient.
- Roll each stuffed chicken first in flour to create a dry surface, then dip in beaten egg to help the coating stick, and finally press firmly into panko breadcrumbs. Make sure every surface is well-coated — this is what creates the crispy shell.
- Arrange the breaded chicken seam-side down on your prepared baking sheet, then drizzle evenly with melted butter. The butter helps the breadcrumbs turn beautifully golden.
- Bake until the internal temperature hits exactly 165°F and the coating turns a deep golden brown. Don't open the oven door too often — you want steady heat to crisp the coating.⏱ 25 min
- Let the chicken rest for 5 minutes before carefully removing the toothpicks. This brief rest helps the juices redistribute so they don't all run out when you slice.⏱ 5 min
Tips & Tricks
- Pound the chicken between plastic wrap or parchment to prevent splattering, and aim for consistent thickness — uneven spots will cook at different rates.
- Use good deli ham, not lunch meat slices; the texture and flavor make a noticeable difference in the final dish.
- Press the panko coating firmly with your palms after coating each piece — loose breadcrumbs will fall off during baking.
- Insert toothpicks at an angle rather than straight down, which makes them easier to remove after cooking.
- If your chicken is very thick, butterfly it first before pounding to make the flattening process easier and more even.
Frequently Asked Questions
Can I make these ahead of time?
You can bread them up to 4 hours ahead and refrigerate, which actually helps the coating stick better. Don't stuff and roll more than a day ahead — the chicken will start breaking down.
What can I substitute for Swiss cheese?
Gruyere is the closest match, or try provolone for something milder. Avoid soft cheeses like brie — they'll leak out during cooking.
Why is my breading falling off during baking?
This usually means the chicken wasn't dry enough before breading, or you didn't press the panko firmly into the surface. Pat the chicken completely dry and really press that coating on.
How do I know when they're done without cutting into them?
Use a meat thermometer inserted into the thickest part — 165°F is your target. The outside should be deep golden brown, not pale.